Jerky Maker 101
From elgourmand 13 years agoIngredients
- The Dehydrator: shopping list
- What you’ll need: shopping list
- • A sturdy cardboard box 12” x 12” x 12” (30 x 30 x 30 cm). This isn’t rocket science so close is okay. You need a box with the top & bottom flaps intact. shopping list
- • 2 pieces of ½” (1.25cm) PVC pipe 14” (36cm) long. Here you can use wooden dowels or whatever. Think function. I used two pieces of 3/8” (1cm) copper tubing because I had some handy. shopping list
- • 10 or so sturdy bamboo or steel skewers. shopping list
- • Portable light socket. shopping list
- • A 100 watt incandescent light bulb. shopping list
- • A cookie sheet or shallow baking pan a bit bigger than the box. shopping list
- • A sharp knife. shopping list
- • A pair of sturdy scissors, optional but handy. shopping list
- • Some heavy duty packing tape. shopping list
- • A marker or pencil, crayon, whatever you like to make marks with. shopping list
- • A ruler or yardstick. shopping list
How to make it
- How to make it:
- 1. If you got your box from your grocery store cut the tape on the bottom flaps & lay the box flat, with the flaps out.
- 2. Draw a line 1 inch (2.5cm) up from the bottom edge of the bottom flaps. Do this on both sides of the box.
- 3. Identify the corners of the box & draw a vertical line 3 inches (7.5cm) in from each corner, on each side.
- 4. Cut out the 1 x 6 inch centre section on each side of the box. This will leave yo with a corner “leg” 1 inch high and 3 inches on each side. See Photo
- 5. Go to the top of the box & draw a line on both sides 2 inches (5cm) below the flaps.
- 6. Using the PVC pipe, or whatever you’re using, draw a circle just below this line and just in from the corner on two opposite sides of the box.
- 7. Cut out these four holes.
- 8. Open out your box so it is really is a box.
- 9. Use the packing tape to tape the two halves of each leg together.
- 10. Insert the PVC pipe, or whatever you decided to use, in the holes you cut for it See Photo. These are your side rails.
- 11. Fold the top flaps in, like you would if you were going to seal the box.
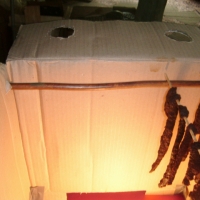
- 12. Find something about 2” (cm) in diameter and use it to let you draw four circles on the top of the box; 1 circle in each quarter section. See Photo
- 13. Cut out the four holes you’ve just drawn.
- 14. Find the place where your jerky maker is going to do its thing. It will take several hours to jerk a batch of meat, or whatever, so the middle of the kitchen table may not be the best choice. Ideally, wherever you put it should not get colder than 65o F (18o C). Do remember that cats & dogs like jerk a whole bunch.
- 15. Rig up your light socket & 100 watt bulb, place on the cookie sheet, or whatever.
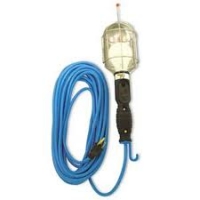
- 16. My choice of lights would be this one See Photo
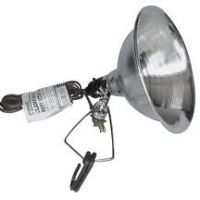
- 17. Or this one. See Photo
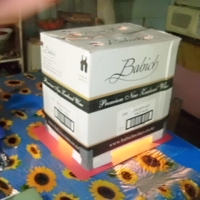
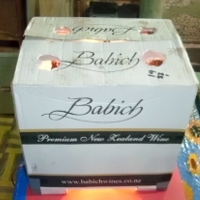
- 18. Set your box on the cookie sheet, over the light.
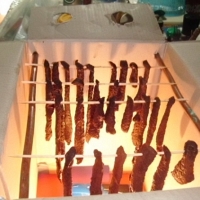
- 19. Load up whatever you’re going to jerk, beef, venison, fish, etc. See Photo
- 20. Turn on your light.
- 21. Close the top flaps.
- 22. Have patience.
People Who Like This Dish 3
- clbacon Birmingham, AL
- elgourmand Apia, WS
- Show up here?Review or Bookmark it! ✔
The Groups
- Not added to any groups yet!

Reviews & Comments 0
-
All Comments
-
Your Comments