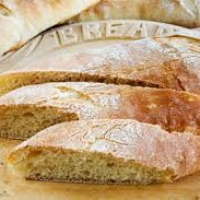
European Bread
From elgourmand2 8 years agoIngredients
- Poolish: shopping list
- • 1/3 cup cool water (about 65°F). shopping list
- • 1/2 cup European-Style Artisan bread flour or white bread flour. shopping list
- • 1/16 teaspoon (a pinch) instant yeast. shopping list
- Dough: shopping list
- • All of the poolish (above). shopping list
- • 3/4 cup cool water, about 65°F. shopping list
- • 2 1/2 cups European-Style Artisan bread flour or white bread flour. shopping list
- • 1 teaspoon instant yeast. shopping list
- • 2 Tbs. olive oil, Optional. shopping list
- • 1 1/4 teaspoons salt. shopping list
How to make it
- The poolish:
- 1. In a medium-sized bowl, combine all of the poolish ingredients, mixing just till a cohesive dough forms.
- 2. Allow the poolish to rest, covered, for 12 to 16 hours at room temperature. When the poolish is ready to use, it will be filled with large holes and bubbles.
- The dough:
- 1. Add the water to the poolish, and mix till smooth.
- 2. Add the flour, mix till just combined, cover the bowl, and allow the mixture to rest for 20 minutes. This rest period (autolyse, in French) allows the flour to absorb the liquid and the gluten to start its development, making kneading easier and more effective.
- 3. Add the yeast and salt, and knead the dough till it’s fairly smooth but not necessarily elastic, about 5 to 7 minutes by hand, 5 minutes by electric mixer, or 5 to 7 minutes in a bread machine. (The gluten will continue to develop as the dough rises, so you don’t want to develop it fully during the kneading process.)
- 4. Place the dough in a lightly greased bowl, cover the bowl, and allow the dough to rise, at room temperature, for 1 1/2 hours. To help develop the gluten, distribute the yeast’s food, and expel any excess carbon dioxide, turn the dough every 30 minutes during the rising time: gently fold all four sides into the middle, and turn the dough over.
- 5. Transfer the dough to a lightly greased work surface, divide it in half, shape each half into a rough log, cover them, and let them rest for 15 to 20 minutes. Again, this gives the gluten a chance to relax.
- 6. Shape the logs into batards (shorter and fatter than traditional French baguettes) or Italian-style loaves—tapered ovals about 12″ long.
- 7. Place them on a lightly greased or parchment-covered baking sheet, cover them with an acrylic dough cover, or gently with lightly greased plastic wrap, and allow them to rise, at room temperature, for about 2 hours; they should rise about three-quarters of the way to doubled. If they rise too much they’ll lose their shape in the oven, so be sure they don’t over-rise.
- 8. Using a sharp knife or razor, and holding it parallel to the dough*, make four slashes in each loaf. These should be more nearly vertical (running down the loaf) than horizontal (running crosswise), each stretching about one-third the length of the loaf. Spray the loaves with warm water.
- 9. Preheat your oven to 425°F (220 C), making sure you give it plenty of time to heat; this bread needs to go into a HOT oven.
- 10. Bake the bread for 30 to 35 minutes, or until it’s a deep, golden brown. See Photo
- Note: European bread is generally baked longer than American loaves; if you’re uncomfortable with a very dark crust, reduce the baking time a bit.
- 11. Turn off the oven, crack the door open about 4 to 6 inches, and allow the bread to cool in the oven; this will help it retain its crunchy crust.
- 12. Serve. See Photo
- Hints for making European bread …
- Time: Flavor comes from long, slow fermentation (rising) at relatively low temperatures. An ambient rising temperature of 70°F to 80°F results in the best-flavored bread. Using a “pre-ferment” (variously known as a poolish, a biga, a sponge, or a levain), as we do in the preceding recipe, helps develop even more flavor.
- Use more water: Wetter is usually better. A slack (wet) dough allows for a more active fermentation and complete development of the gluten structure. A hydration of 65% or more based on total flour weight is a good place to start; the hydration in the preceding recipe is about 68%. (Consider the weight of the flour is 100%, then divide the weight of the water into the weight of the flour to find the hydration level. For example, if your flour weighs 12 ounces, using 6 ounces of water would give you 50% hydration.)
- An iron fist, a velvet glove: Handle dough gently during shaping. Forget all you’ve heard about punching and slapping your dough; hey, dough is a living creature. Do you think it enjoys being punched and slapped? When you’re deflating dough at any point during its fermentation process, simply fold it over gently onto itself. And when you’re shaping, you don’t want to expel all the air; just make sure the dough is smooth, without huge air pockets.
People Who Like This Dish 5
- ttaaccoo Buffalo, NY
- jlv1023 Ansonia, Connecticut
- Karen_B Omaha, NE
- twill10 Cape Girardeau, MO
- sunnyhill8 Dublin, Ireland
- elgourmand2 APia, Samoa
- Show up here?Review or Bookmark it! ✔
The Groups
- Not added to any groups yet!


Reviews & Comments 0
-
All Comments
-
Your Comments