Pumpkin Seed Homemade Jewelry
From tuilelaith 16 years ago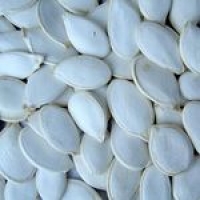
- 1 minutes to make
- Serves 1
Here is yet another one of those fun things I like to collect.
Ingredients
- Halloween Crafts for Kids: Age Appropriateness shopping list
- This Halloween craft using pumpkin seeds is for middle school children and older, since it involves using a sewing needle. shopping list
- ~ shopping list
- Materials Needed to Make pumpkin seed Homemade Jewelry shopping list
- one large sewing needle shopping list
- strands of dental waxed dental floss shopping list
- cooked pumpkin seeds shopping list
- a thimble shopping list
- a piece of cardboard shopping list
- scissors shopping list
How to make it
- Why Dental Floss?
- This Halloween craft uses dental floss for a number of reasons.
- One reason is because it is an item that should be found in the house.
- Also , it is a great and subtle reminder to kids to brush and floss, especially around Halloween when they eat more candy and sweets than they usually do.
- Another reason to use dental floss is that it is a strong kind of string.
- ~
- Preparation for Making Pumpkin Seed Homemade Jewelry
- First you need to make some homemade roasted pumpkin seeds.
- Next, measure the dental floss into different lengths.
- Measure the dental floss on your wrist to find the right length to make a pumpkin seed bracelet.
- Or measure a piece around you neck, so it hangs about half down your chest.
- For each strand, about at least one inch the the dental floss before cutting it.
- Or have an adult cut up the dental floss.
- This will make it easier to tie a knot on the jewelry when you are done.
- ~
- Threading the Needle for the Homemade Jewelry
- It takes some practice, and some patience, to thread a needle.
- Hopefully the sewing needle you have has a large "eye." That is where the dental floss goes.
- Thread one end of the dental floss through the eye of the needle.
- Ask an adult for help if you are having trouble.
- Tie a knot at one end of the dental floss.
- ~
- How Many Seeds for the Homemade Jewelry?
- Now the fun begins!
- The homemade pumpkin seed jewelry does not have to be a complete strand of pumpkin seeds.
- Depending on how easily the seeds are stringing, and how many seeds you want, you can stop anytime you'd like. '
- 'The homemade jewelry made of pumpkin seeds can have 20 seeds or 200, it's up to you.
- ~
- How to Make Pumpkin Seed Homemade Jewelry
- Place a small piece of cardboard in front of you on a table.
- The cardboard will help you when you put the sewing needle through the seed.
- Put one seed on the cardboard.
- Press the needle into the seed until it goes through both ends of the seed and you feel the needle the cardboard.
- Lift up the thread and pull the seed to the end of the thread, to the knot.
- Repeat as often as you wish.
- When finished tie both ends of the homemade jewelry into a knot.
- Wear the homemade pumpkin seed necklace or give it to a friend.
People Who Like This Dish 2
- annieamie Los Angeles, US
- m2googee Tomball, TX
- mrsc543 North Reading, MA
- karlyn255 Ypsilanti, MI
- minitindel THE HEART OF THE WINE COUNTRY, CA
- tuilelaith Columbia, MO
- Show up here?Review or Bookmark it! ✔

The Rating
Reviewed by 5 people-
I will pass this along to my daughter! Thanks for sharing.
 mrsc543
in North Reading loved it
mrsc543
in North Reading loved it
-
What a great idea! Thank you for posting this here as I'm sure a lot of parents would love to find an activity before Halloween that not only help young ones focus on a task but gives them a fun piece of jewelry to romp around in on Halloween!
 annieamie
in Los Angeles loved it
annieamie
in Los Angeles loved it
-
very clever idea thank you very much
tink minitindel
in THE HEART OF THE WINE COUNTRY loved it
minitindel
in THE HEART OF THE WINE COUNTRY loved it
The Groups
- Not added to any groups yet!
Reviews & Comments 3
-
All Comments
-
Your Comments
" It was excellent "
" It was excellent "
" It was excellent "