Sushi 101 Rolling
From boofie 17 years ago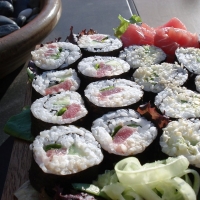
- 384 minutes to make
- Serves 500
A quick little step-by-step on rolling the perfect sushi roll.
Ingredients
- Bamboo rolling mat shopping list
- Plastic cling wrap (optional) shopping list
- Cutting board shopping list
- Sharp, non-serrated knife shopping list
- water shopping list
- ******** shopping list
- nori shopping list
- sushi rice shopping list
- Sushi fillings shopping list
How to make it
- Assemble ingredients and prepare your rolling station.
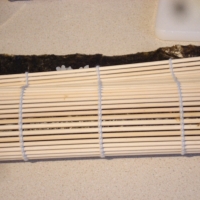
- Arrange bamboo mat so that the rods are perpendicular to your body. Lay nori sheet on mat with short side facing you.
- Lightly spread 1-1.5 cups of prepared sushi rice over nori, leaving a 1" wide bare strip on the short end away from you. Do not press rice.
- Arrange roll filling in a strip across the rice, about 1/3 of the length of the nori away from you.
- With the fingers of each hand holding the filling in place and your thumbs at the edge of the mat nearest you, carefull begin to pull the mat and nori over the filling (with your thumbs) while tucking the filing under.
- Once the first tuck-and-roll is completed, I like to slide my sushi back into the center of my mat to give me more room to work. Regardless, pull your bamboo mat out so it doesn't get rolled in!
- With gentle, even pressure, continue rolling the sushi up by pulling the bamboo away from you.
- Once you have successfully closed your roll, wrap the bamboo mat around it once more and gently squeeze the length of the roll to ensure it is tight and thoroughly sealed. Lightly rolling it back and forth will help achieve a nice, round log (it may be kind of square or flat).
- To serve, cut sushi log in half with a very sharp knife. Wetting the blade will prevent it from sticking to the rice as it goes through. Continue halving until you have desired number of pieces. Enjoy!
- **Sometimes, the ends can be really messy and have stuff sticking out. I like to cut just the very ends off my rolls before I cut them to serve.**
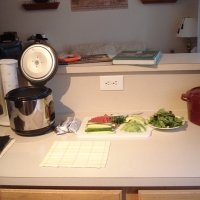 The assembly line.
Close
The assembly line.
Close
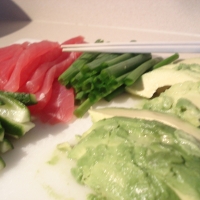 Fillings all ready to go.
Close
Fillings all ready to go.
Close
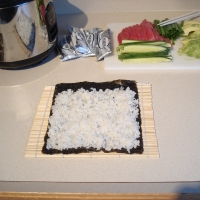 Spread prepared rice over nori.
Close
Spread prepared rice over nori.
Close
 Arrange desired fillings 1/3 length away in an even strip.
Close
Arrange desired fillings 1/3 length away in an even strip.
Close
 Begin the roll by tucking the ingredients in with your fingers and puling away with your thumbs.
Close
Begin the roll by tucking the ingredients in with your fingers and puling away with your thumbs.
Close
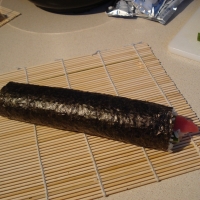 Continue rolling until everything is tight and thoroughly sealed.
Close
Continue rolling until everything is tight and thoroughly sealed.
Close

The Rating
Reviewed by 6 people-
I love the step by step photos! I love sushi, but have never made it myself. This gives me the know-how and nerve to try it!High-five!!!
 angelinaw
in St Louis loved it
angelinaw
in St Louis loved it
-
This looks awesome!!! Thanks so much for the step-by-step! i love sushi, but have trouble finding yummy veggie options - now i can make all sorts of veggie sushi in my own home :D thanks for sharing!! :)
 aluminum_chef
in Montreal loved it
aluminum_chef
in Montreal loved it
-
will and save and print for my daughter high5 recipe thanks high5
 momo_55grandma
in Mountianview loved it
momo_55grandma
in Mountianview loved it
The Groups
- Not added to any groups yet!
Reviews & Comments 6
-
All Comments
-
Your Comments
" It was excellent "
" It was excellent "
" It was excellent "
" It was excellent "
" It was excellent "