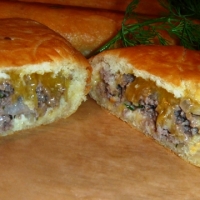
Beef & Cheese Piroshki
From luisascatering 13 years agoIngredients
- for the dough: shopping list
- 6 tablespoons unsalted butter shopping list
- 1 cup organic whole milk shopping list
- 2 tablespoons granulated sugar shopping list
- 1 teaspoon kosher salt shopping list
- 2 large organic eggs shopping list
- 4 cups unbleached all purpose flour, plus more as needed shopping list
- 1 package (2 1/4 teaspoons) yeast shopping list
- ~ shopping list
- for the filling: shopping list
- 2 tablespoons unsalted butter shopping list
- 1 small onion, finely chopped shopping list
- 1 1/2 lb. grass-fed ground beef shopping list
- a few drops of soy sauce shopping list
- 1 tablespoon cornstarch shopping list
- 1/4 cup of mixed fresh dill and parsely, finely chopped shopping list
- kosher salt and fresh ground pepper, to taste shopping list
- 2 cups Tillamook medium cheddar cheese, grated shopping list
How to make it
- For the dough:
- Add all ingredients in order to your bread machine and set on "dough" cycle (if you don't have a bread machine, let me know if you need "by hand" directions).
- For the filling:
- Melt butter in large nonstick saute pan. Saute onion until soft. Add ground beef and brown (smooshing down with spoon and you stir to get rid of any large clumps - you want the filling to be fine). Add seasonings and herbs. Sprinkle with cornstarch (it just helps slightly thicken the filling). Set aside.
- Assembly:
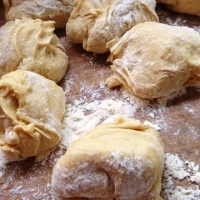
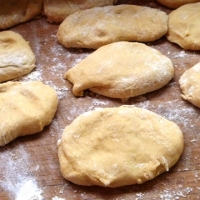
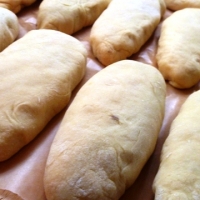
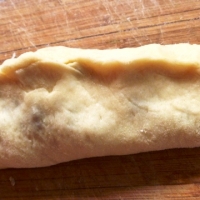
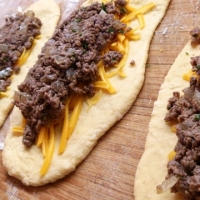
- On a floured surface, divide the dough into 12 equal pieces See Photo. Roll out each piece in an oval shape See Photo. Cover each with a little cheese, 1/2 inch from the edges of dough. Measure about 1/2 cup of filling and place in center of each oval See Photo. Pinch the dough together to firmly seal See Photo. Place the piroshki seam side down on a board or baking sheet lined with parchment paper and lightly press down to flatten. Shape the remaining piroshki the same way, leaving space between them on the parchment paper See Photo. The piroshki should only become slightly puff before cooking.
- To cook the piroshki:
- Heat about 1/2 inch oil in a large skillet over medium heat to 350F. Line baking sheet with several thicknesses of paper towels. When the oil is ready, gently slip 3 piroshki seam side down into the hot oil and cook for about 2 minutes per side (you want them to be a deep, golden brown). Monitor the heat of the oil and adjust the heat as necessary. Remove the piroshki from the oil with tongs, letting the excess oil drain back into the pan and place on paper towels to drain further. Cook the remaining piroshki 3 at a time.
- Note: Piroshki can also be baked instead of fried: preheat oven to 375 degrees and bake for 20-25 minutes - or until golden brown
- Storing:
- Piroshki can be frozen when completely cool. Arrange them in single layer on a baking sheet and freeze until solid. Transfer to heavy-duty resealable plastic bags and freeze for up to 1 month. TO serve, thaw the piroshki in their wrapping, remove then arrange on baking sheet. Reheat in a preheated 350F oven for 10-15 minutes.
The Rating
Reviewed by 1 people-
These look absolutely lovely!!! How would you do it with a stand mixer and a a dough hook? If you don't mind I would love to know. :-)
 Good4U
in Perth loved it
-
Luisa, Thanks an bunch for going to all the trouble of writting the dough directions down for a stand mixer. It is very much appeciated.:-)
 Good4U
in Perth loved it
-
These are very tasty and worth while taking the time to make. The crust and filling tastes heavenly together! Whether just out of the oven, or after being fried. I have to admit, I rarely fry anything, but I did them both fried and baked. Luisa's ins...more
 Good4U
in Perth loved it


Reviews & Comments 15
-
All Comments
-
Your Comments
" It was excellent "
" It was excellent "
" It was excellent "
" It was excellent "